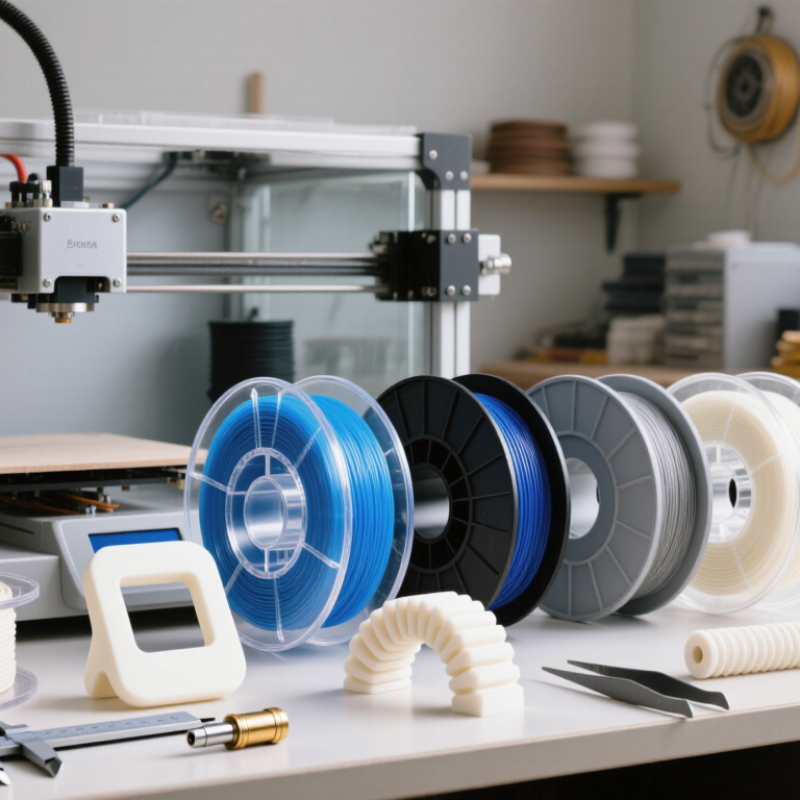
Choosing the right 3d printing plastic can decide whether a part becomes a useful tool or a brittle mistake. A spool may look excellent online, yet behave differently beside a hot nozzle, sharp corner, or sunny window. PLA can produce clean prototypes with low warping. PETG offers toughness and chemical resistance. ABS and ASA may survive higher temperatures, but they demand better ventilation and enclosure control. Nylon brings strength, though moisture can quietly damage print quality.
Additive manufacturing expert Dr. Ian Gibson has stressed, “Material selection is one of the most important decisions in additive manufacturing.” That advice sounds simple. It is not always easy to apply. A material’s label never tells the whole story. Filament diameter, drying conditions, nozzle temperature, cooling, layer height, and printer design all influence the result.
This guide presents seven practical tips for choosing 3d printing plastic with greater confidence. It considers strength, flexibility, heat resistance, surface finish, ease of printing, and part purpose. Imagine a phone bracket warming inside a car, or a workshop jig absorbing repeated impact. The best filament changes with that situation.
Some choices may still require testing. That is normal. A small temperature tower or bending sample can reveal more than a product description. I have seen attractive prints fail because the material was selected for appearance instead of workload. That mistake is easy to repeat. These tips aim to make the decision clearer, safer, and more evidence-based, while acknowledging that no single plastic performs perfectly in every printer or application.
Tip 1: Match the plastic to the part’s working conditions. PLA is easy to print and gives sharp details, making it useful for prototypes, models, and indoor objects. It can soften in high heat, though. I learned this after a dark-colored test part warped near a sunny window.
Tip 2: Consider stronger engineering plastics. ABS tolerates higher temperatures and impact, but it may shrink during cooling. PETG offers a practical balance of strength, chemical resistance, and simpler printing. It often works well for brackets, containers, and workshop fixtures. Good ventilation still matters, especially with materials that produce noticeable fumes.
Tip 3: Check flexibility and moisture sensitivity. TPU bends without cracking, so it suits seals, grips, and protective covers. Nylon can provide excellent strength and wear resistance, but it absorbs moisture quickly. Wet filament may create bubbles, rough surfaces, and weak layers. Dry storage is not optional.
The printer also limits your choice. Confirm the nozzle temperature, heated-bed range, chamber requirements, and build-surface compatibility. A material may look ideal on paper but fail during printing. I sometimes prioritize strength too heavily and forget surface finish or print time. That is a mistake worth revisiting. Test a small sample first, then inspect layer bonding, warping, stiffness, and dimensional accuracy before producing the final part.
Choosing the best 3D printing plastic starts with your part’s working conditions. A polished surface is not enough. The material must match heat, impact, flexibility, moisture, and load requirements. I have seen strong-looking prototypes crack after repeated bending. The failure came from choosing stiffness over toughness.
Tip 1: Define the part’s job before selecting plastic. For outdoor components, consider ultraviolet exposure and temperature changes. For brackets, check tensile strength and layer adhesion. For clips, flexibility may matter more than hardness. A useful test is simple: print a small sample, then bend, heat, or load it as the final part will experience.
Tip 2: Match plastic behavior to your printer and process. Some materials require a heated build plate, controlled airflow, or a dry storage box. Moisture can create bubbles, weak layers, and rough surfaces. I once blamed poor calibration for a brittle print, but the filament had absorbed humidity. That mistake was avoidable. Measure nozzle temperature carefully, and record each test.
Tip 3: Consider accuracy, finish, and post-processing time. A rigid plastic may hold sharp dimensions, while a flexible one can distort during removal. Thin walls also behave differently from solid blocks. Print orientation changes strength dramatically. Do not trust a datasheet alone. Actual results depend on geometry, cooling, settings, and operator experience. Leave room for testing.
Choosing a 3D printing plastic starts with the part’s real working conditions. Check strength, flexibility, heat resistance, and chemical exposure before comparing materials. A strong material may still crack under repeated bending. That surprised me on an early prototype. Do not judge strength from a single tensile value. Review layer adhesion, print direction, wall thickness, and infill because these factors change performance.
For rigid parts, test tensile and impact strength separately. Tensile strength measures pulling force, while impact resistance reflects sudden knocks. For clips, hinges, and living mechanisms, flexibility matters more than hardness. Measure the expected bend and cycle count. A material that flexes easily may creep under constant load. It can look perfect on day one.
Tip three: print a small fatigue sample before committing to a full batch.
Heat resistance needs practical testing. Compare the service temperature with the softening range, not just the advertised peak. A part near a motor or enclosed heater may deform gradually. Chemical resistance also depends on concentration, contact time, temperature, and stress.
Tip five: expose a test coupon to the actual liquid. Inspect swelling, discoloration, and cracks.
Tip six: print with the intended nozzle settings and orientation.
Tip seven: record failures honestly. My own tests sometimes showed that a cheaper, less rigid material performed better because it absorbed vibration.
Datasheets guide decisions, but controlled testing earns confidence.
Choosing the best 3D printing plastic starts with the machine, not the color. Check nozzle temperature, heated bed range, chamber design, and filament diameter before ordering. A material that melts beautifully may still jam a cold extruder or warp at the corners. Read the printer manual, then compare its tested limits with the plastic’s processing window. Do not trust generic settings alone. Measure the spool width and confirm the feed path can handle flexible or abrasive filament. Start small. Moisture matters more than many beginners expect. Some plastics absorb humidity quickly, causing popping sounds, rough walls, and weak layers. Use a sealed container with fresh desiccant, and dry the spool according to measured moisture or supplier guidance. Keep it dry.
Material handling also shapes safe, repeatable work. Hard-filled plastics can wear a soft nozzle, while flexible grades may need a short, guided path. Keep the spool above the printer, away from dust and direct heat. Check ventilation needs, odor, and workspace temperature before long prints. For functional parts, compare layer adhesion, impact resistance, heat tolerance, and moisture sensitivity instead of judging appearance. A small calibration piece can reveal under-extrusion, curling, or brittle layers before hours are wasted. Record nozzle temperature, bed temperature, drying time, and cooling changes in a simple log. This is where experience helps, although my early settings were sometimes too hot. The result was a brittle part with a glossy surface. I underestimated storage humidity. Treat those mistakes as data, then change one variable per test.
| Tip | Typical Material Choices | Printer Compatibility Check | Typical Printing Range* | Material Handling Needs | Best-Practice Recommendation |
|---|---|---|---|---|---|
| 1. Match the plastic to the application | PLA for easy prototyping; PETG for balanced strength and moisture resistance; ABS or ASA for higher temperature resistance; TPU for flexible parts; nylon for tough, wear-resistant components. | Confirm that the printer supports the required extrusion temperature, build-plate temperature, and chamber conditions. | PLA: approximately 190–220°C nozzle PETG: approximately 220–250°C ABS/ASA: approximately 240–270°C |
Select the material according to load, heat exposure, flexibility, chemical contact, and expected service life. | Use PLA for low-stress visual models, PETG for general functional parts, and engineering plastics when heat or wear resistance is essential. |
| 2. Check nozzle and hot-end requirements | Standard brass nozzles are generally suitable for unfilled PLA, PETG, and ABS. Abrasive-filled plastics require a more wear-resistant nozzle. | Verify the maximum hot-end temperature and whether the nozzle can withstand abrasive additives such as carbon fiber, glass fiber, wood, or glow compounds. | Many common thermoplastics print below 270°C; some high-temperature polymers require substantially higher temperatures and specialized equipment. | Inspect the nozzle for wear and recalibrate extrusion after changing nozzle material or diameter. | Choose a hardened or otherwise wear-resistant nozzle for fiber-filled or mineral-filled filament, and confirm the manufacturer’s temperature limits. |
| 3. Evaluate build-plate and adhesion needs | PLA usually has low shrinkage; PETG has moderate adhesion and can bond strongly to some surfaces; ABS and ASA have greater warping risk; nylon often needs careful surface preparation. | Check whether the printer provides a heated bed, suitable build surface, automatic bed leveling, and enough temperature stability. | Common heated-bed ranges: PLA about 45–60°C; PETG about 70–90°C; ABS/ASA about 90–110°C. | Keep the build surface clean and level. Use a brim, raft, or suitable adhesion aid when recommended for the material. | For warping-prone plastics, reduce drafts, maintain a stable ambient temperature, and consider an enclosed build area. |
| 4. Plan for moisture sensitivity | PLA and PETG absorb moisture over time; nylon, polycarbonate, and some flexible materials are generally more moisture-sensitive. | Determine whether the printer setup includes a dry box or whether an external filament dryer can be used during printing. | Moist filament may cause popping, steam bubbles, rough surfaces, weak layers, and inconsistent extrusion at normal printing temperatures. | Store filament in a sealed container with desiccant. Dry it according to the filament supplier’s time and temperature instructions. | Use a dry-storage workflow for nylon and other hygroscopic plastics, especially in humid environments or after extended exposure to air. |
| 5. Consider enclosure and ventilation requirements | PLA generally prints well in an open setup. ABS and ASA benefit from an enclosure. Some plastics can release irritating vapors or ultrafine particles during heating. | Check for an enclosure, controlled airflow, suitable ventilation, and operating instructions for the chosen material. | Enclosure requirements depend on part size, geometry, ambient temperature, and the plastic’s shrinkage behavior. | Operate in a well-ventilated area and follow applicable workplace safety guidance. Avoid using unknown plastics without safety information. | Use an enclosure for materials that are prone to warping, but do not block required cooling or exceed the printer’s approved operating conditions. |
| 6. Compare strength, flexibility, and heat resistance | PLA is stiff but relatively brittle; PETG is tougher and more ductile; ABS and ASA offer useful impact and heat performance; TPU provides elasticity; nylon offers toughness and abrasion resistance. | Confirm that the printer can maintain stable temperature control and that the slicer supports the selected material profile. | Mechanical performance depends strongly on layer orientation, infill, wall count, cooling, print temperature, and post-processing. | Test representative samples instead of relying only on datasheet values, because printed parts are anisotropic and may be weaker between layers. | Select the plastic based on the actual failure mode: brittleness, deformation, repeated flexing, impact, heat, or surface wear. |
| 7. Review finishing, accuracy, and operating cost | PLA is easy to print and finish mechanically; ABS and ASA can be smoothed with appropriate solvent methods; PETG is durable but can be more difficult to sand cleanly; flexible materials may need slower printing. | Check the printer’s motion stability, extrusion consistency, cooling control, and ability to print at the required speed and layer height. | Typical layer heights range from about 0.08–0.30 mm, depending on nozzle diameter, part detail, and required surface finish. | Account for filament price, drying time, support material, failed prints, post-processing labor, and storage requirements. | Run a small validation print first, then compare dimensional accuracy, surface quality, labor, and total cost before selecting a material for production. |
*Temperature ranges are general starting points for common filament formulations. Always follow the specific filament supplier’s technical data and safety instructions, because formulations and printer performance vary.
7 Tips to Choose the Best 3D Printing Plastic
Start with the part’s real job, not its color. Compare tensile strength, impact resistance, heat tolerance, and moisture sensitivity. A cheaper spool can become expensive after warping, failed supports, or repeated reprints. The 2024 Wohlers Report valued the global additive manufacturing market at $20.035 billion in 2023, showing why material selection deserves commercial attention. Check cost per usable part, not cost per kilogram. Keep a small test coupon beside your printer.
Surface finish depends on more than plastic. Layer height, nozzle size, cooling, and post-processing change the result. Some materials produce sharp corners but reveal visible layer lines. Others sand smoothly but lose dimensional accuracy. For functional prototypes, I often inspect holes, threads, and overhangs first. They expose problems quickly. I still overestimate appearance sometimes. A glossy sample may hide weak bonding.
Safety requires ventilation, suitable temperature control, and the correct safety data sheet. NIOSH research identifies ultrafine particles and volatile emissions as concerns during heated extrusion. Avoid printing unknown formulations near children, food, or poorly ventilated workspaces. Environmental comparisons also need care. The European Environment Agency notes that additive manufacturing can reduce waste, but electricity use and failed prints still matter. Choose recycled or bio-based content only when performance and traceability are documented. Consider service life, repairability, and disposal routes. The greenest option is not always the newest material.